

I love using Zapier for no-code automation but I know that before I used it I was a bit nervous as I wasn’t sure how it worked or how complicated it was.
So this article is designed how to set up your first workflow with step-by-step instructions.
Zapier workflows are called Zaps, and can be used to connect all your business apps to save time and make life so much easier!
The example I’ve chosen is super-simple and will send you a daily SMS to remind you about something – maybe to do Wordle, do some push ups or even take your medication. It can be done using the free plan, which can be used to create up to 5 single-step automations.
Caveat: I know that with modern phones you can create reminders in many other ways, but this is just one way to get to know how to use Zapier and then you can go on and do more sophisticated things.
Note: this only currently works with UK and US phone numbers.
Step 1 – open Zapier
Follow this link to your Zapier dashboard : https://zapier.com/app/dashboard
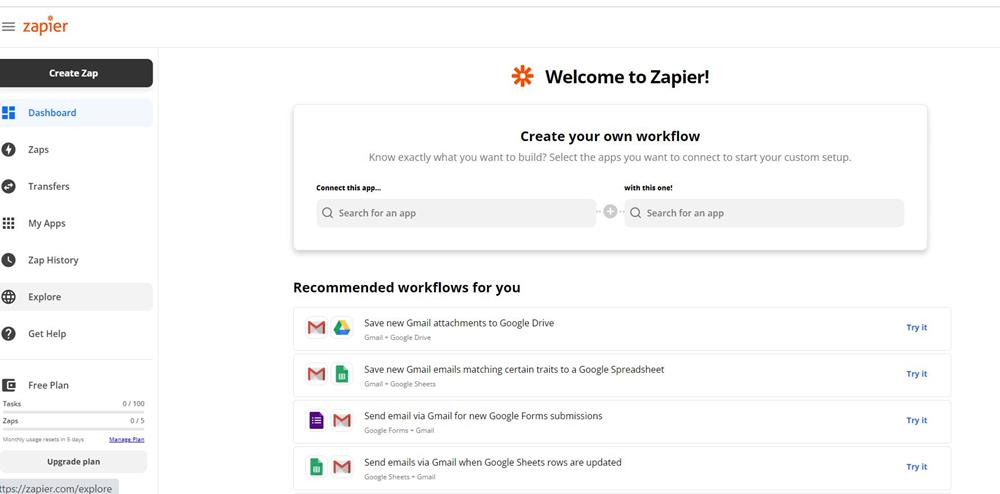
Step 2 – Choose Create Zap
Click the black Create Zap button in the top left hand corner.
You’ll see this screen, the zap editor. This is where you choose the trigger step for your zap.
For our first zap we will choose Schedule By Zapier which actually has a special button on the right hand side, or you can enter ‘schedule’ in the search to find it.
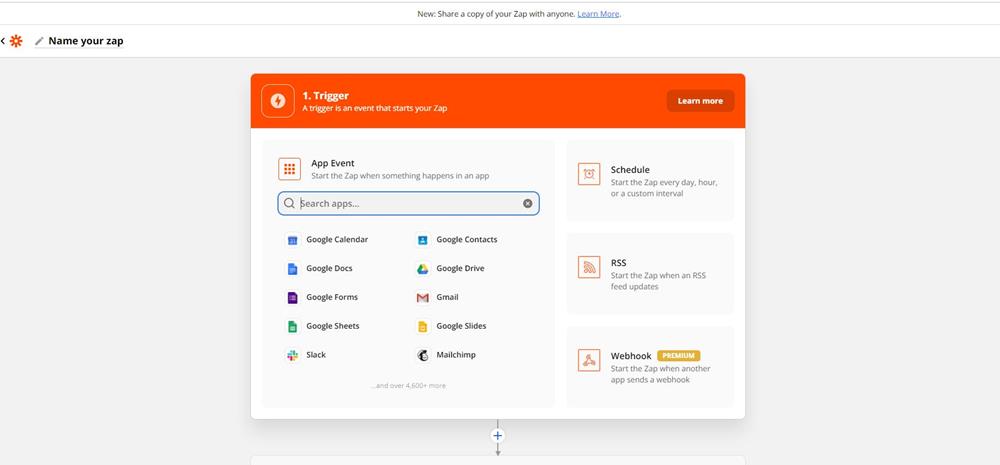
Step 3 – Choose the trigger step
Next, choose your trigger event. For Schedule By Zapier this is when the zap will be run – it can be ‘every day’ or ‘every week’ etc.
Choose ‘every day’ for our example, then click Continue.
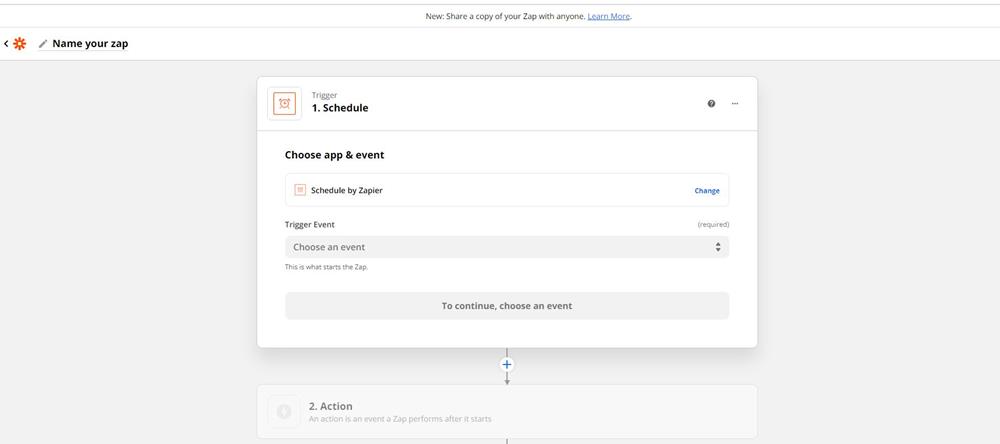
Step 4 – Configure the trigger
You can choose whether to run the trigger on weekends or just on weekdays. The default is to run it on weekends too. Leave this unless you’d rather not run the automation on weekends too.
Then choose what time of day you’d like to trigger the activity. I chose 9am in my example but you can choose whatever time suits you best.
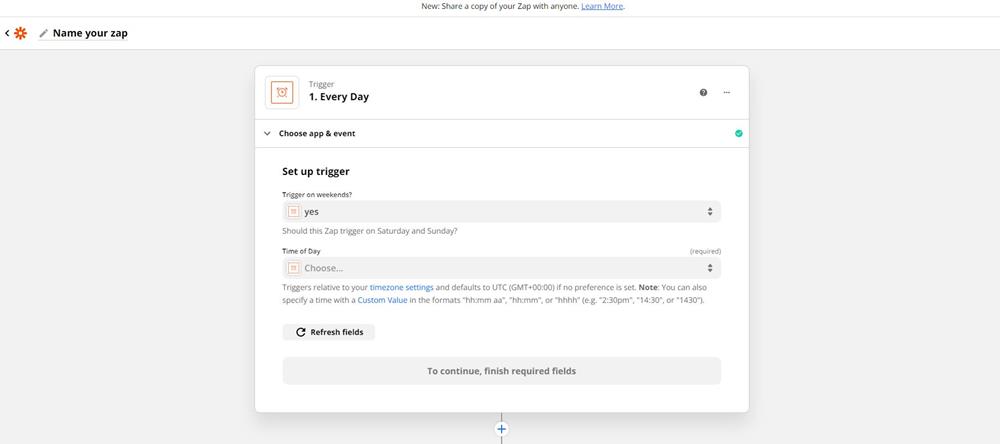
Step 5 – Test the trigger
When you choose Continue you’ll be asked to Test Trigger. This checks that you have the right data in your trigger app, which for the example we are doing will always success because it’s checking that 9am today was a valid date/time! If you were using another trigger such as certain data being in a Google Sheet then it might not always find it. Don’t worry about that for now, because for our zap the test will always work.
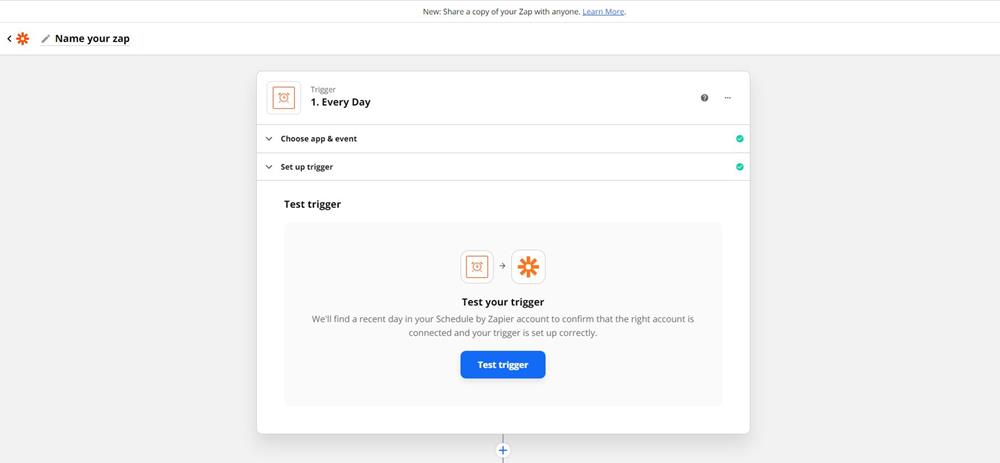
This is the screen you’ll see when the test was successful.
Step 6 – Choose the action app
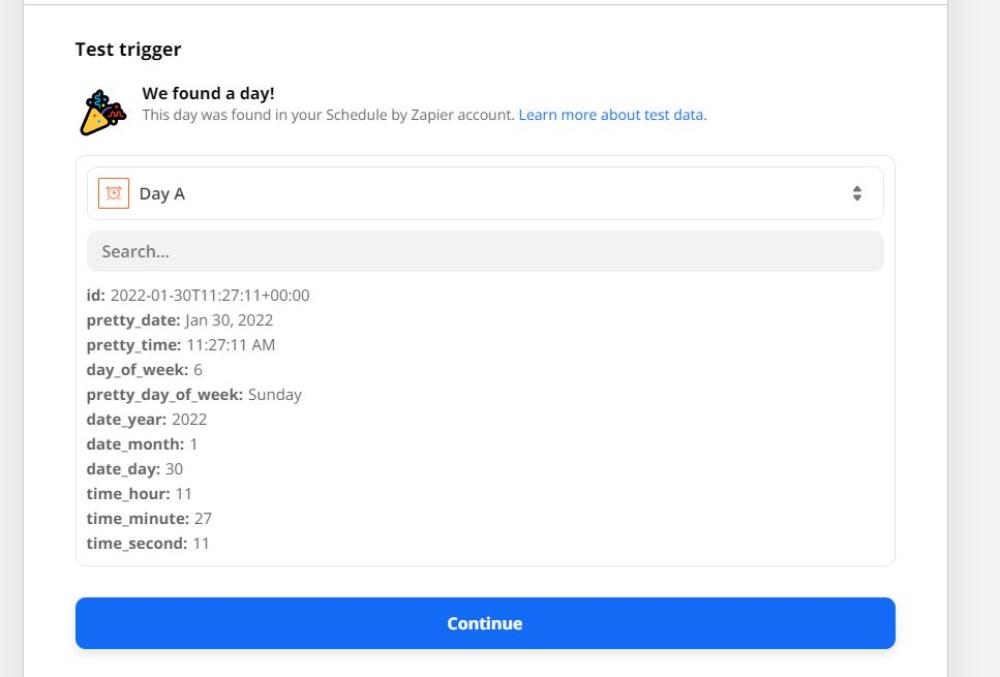
Now you’ll choose the action, which is the activity you want to happen as a result of the trigger. For our example choose SMS by Zapier by typing ‘SMS’ in the search bar.
Step 7 – choose the action event
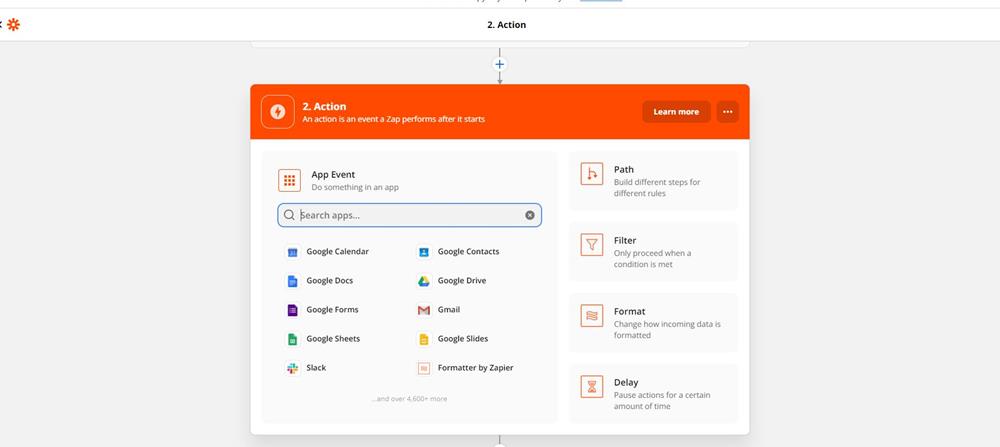
Now choose what event the app will perform. For SMS By Zapier there is only one event, which is to send an SMS.
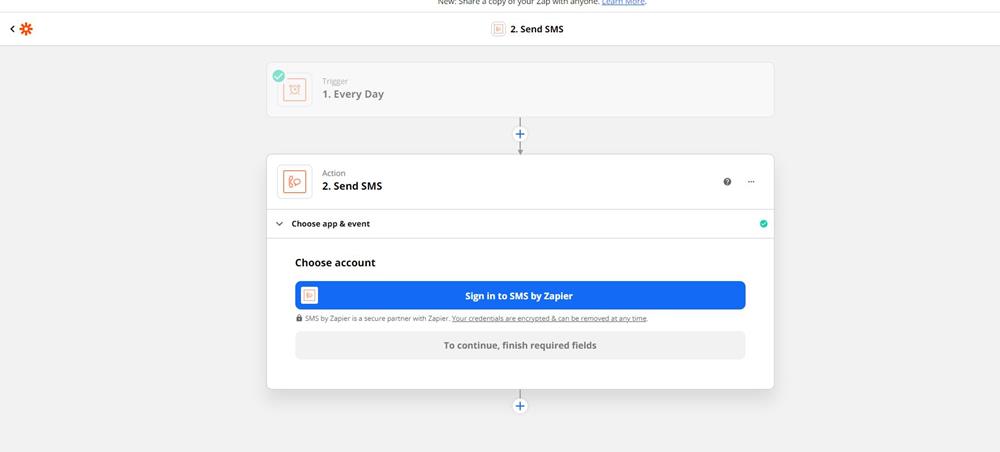
Step 8 – Sign into SMS by Zapier
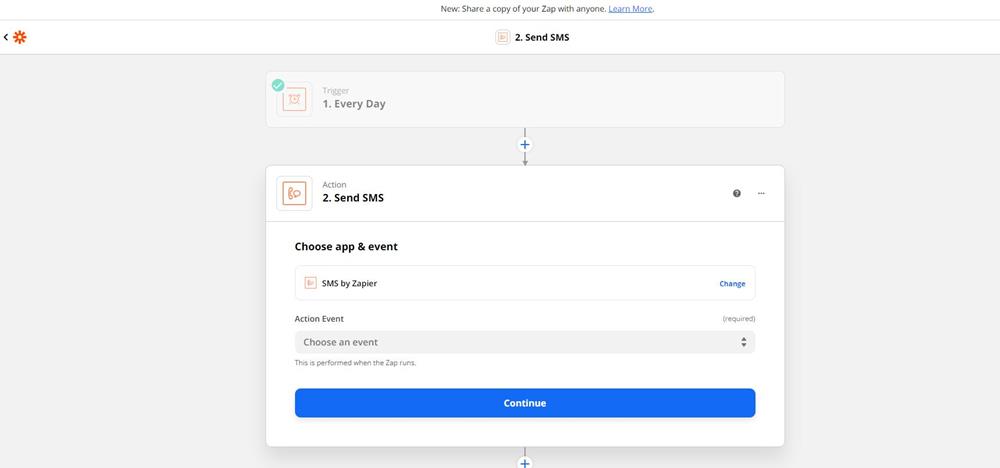
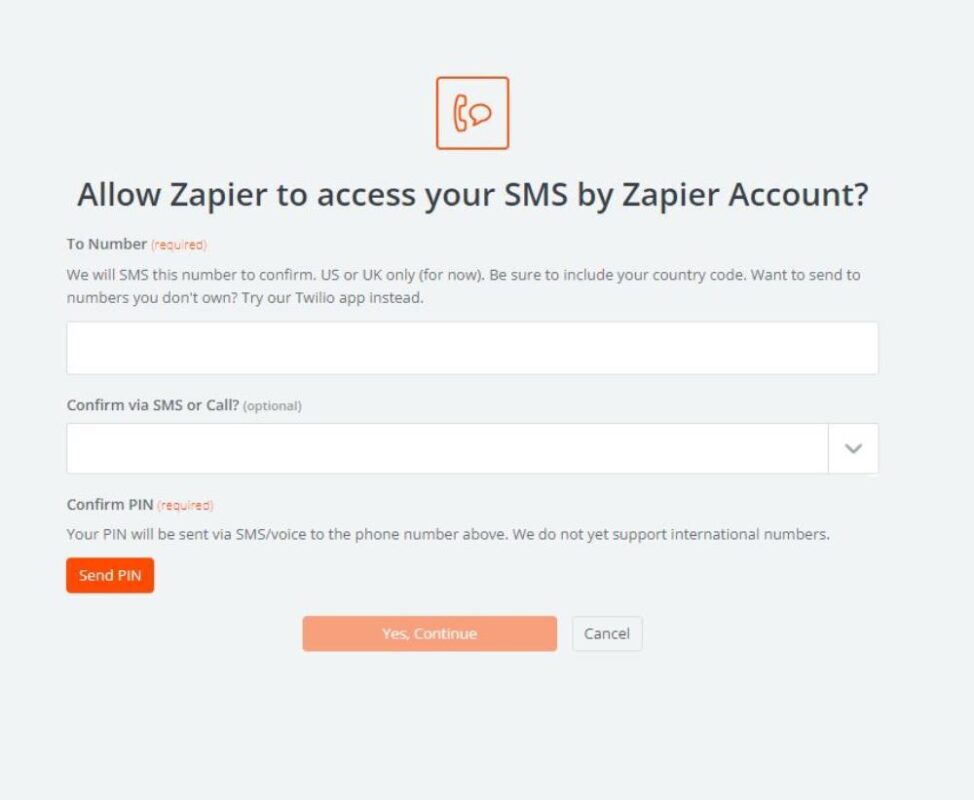
Now you’ll need to sign into SMS by Zapier. It brings up a screen where you enter your mobile number and choose whether to authenticate by SMS or by calling. I usually choose SMS and what it does is send a PIN to your mobile phone which you then need to enter.
Note: include your country code, so for the UK enter +44 and then omit the ‘0’ from your phone number. This only works in the US and UK.
Step 10 – Set up the action step
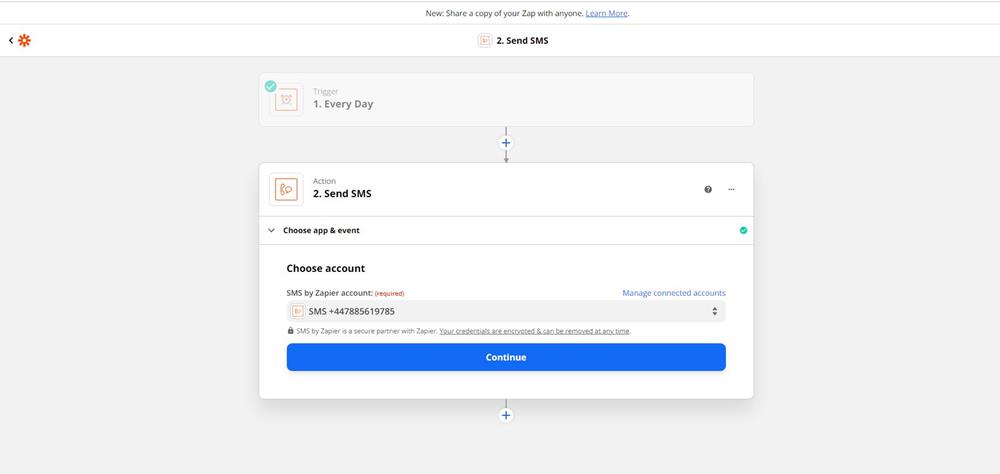
You’ll then return to the zap setup and your mobile number will be shown on the screen. You can now set up the details for the action step, so click Continue.
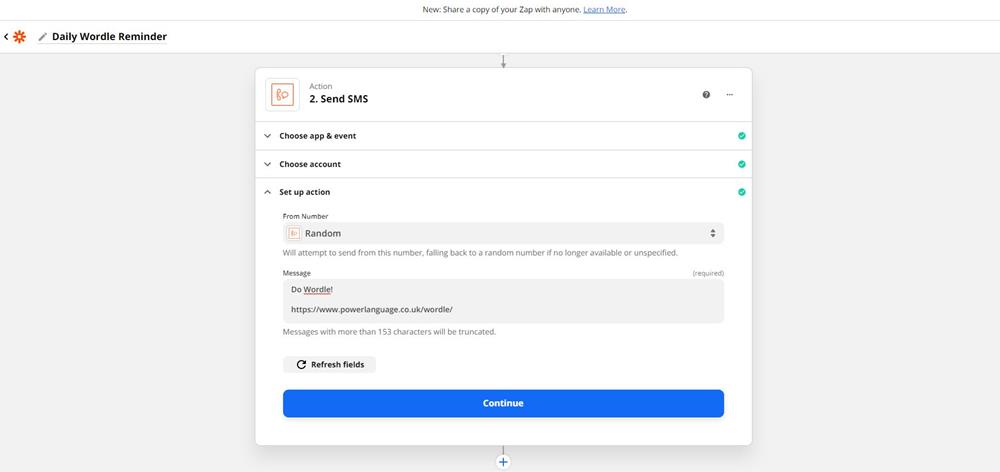
For the From Number I always choose ‘Random Number’. This then appears on your phone as a message from ‘Zapier’.
In the message, you can put whatever you want to remind yourself. For a Wordle reminder I add the URL for Wordle there. But you can say ‘Do some situps’ or ‘take your medication’. Whatever you want!
Step 11 – Test the zap
Click Continue and then Test And Continue. This will test the zap and actually send an SMS to your mobile phone. When it does this you’ll see a confirmation on the screen to let you know if it was successful.
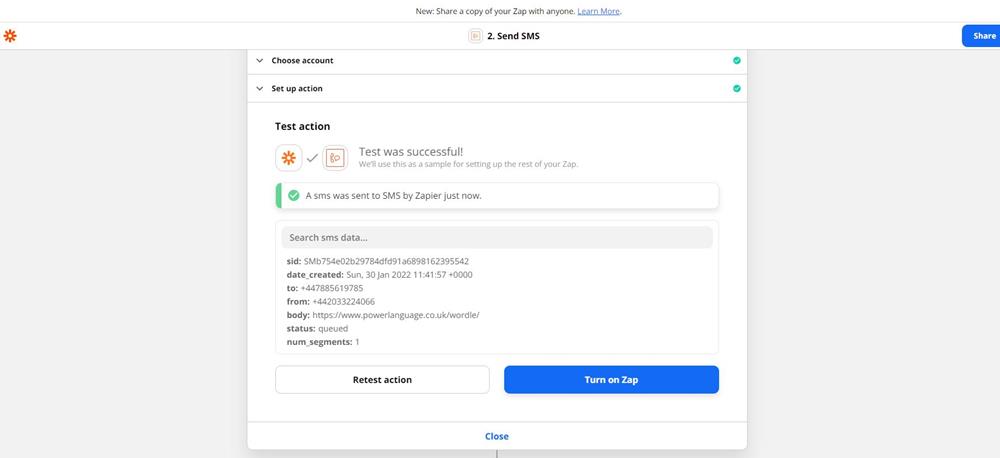
It’s all done! You can then choose Turn On Zap and it will then run daily. If you click ‘Back to Setup’ then you can give your zap a name, like ‘Daily Wordle reminder’.
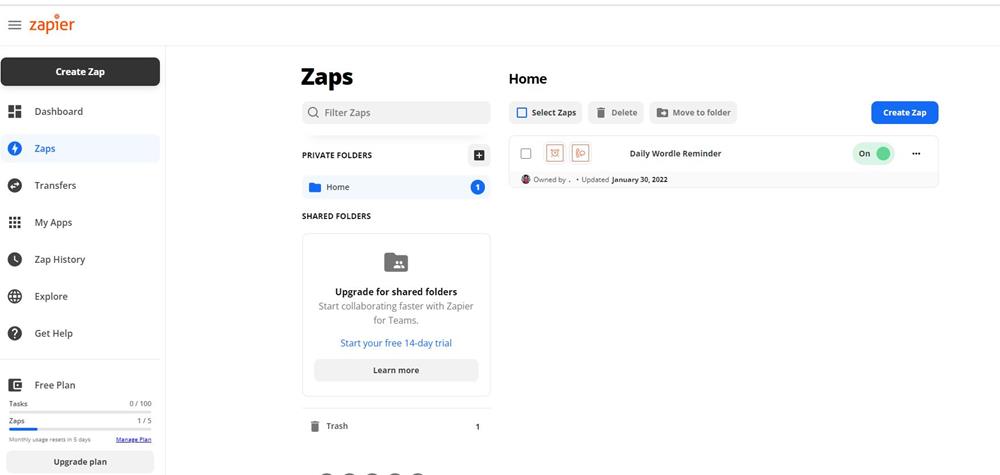
You’ll see your zap listed in the dashboard.
What else can I use this for?
Now that you’ve learned the basics, you could extend this for some really cool things, like
- Get an SMS reminder when a Zoom call is about to start
- Get an SMS whenever a certain person sends you an email (I use this for when my host replies to a support ticket, so I can get onto it ASAP)
- Get an SMS when a Facebook page publishes a new post (I use this for one of my clients as I schedule the posts in advance and want to be reminded when they publish)
- Get an SMS when a YouTube channel posts a new video
The possibilities are endless! Happy automating 😊