
I encourage my clients to write blogs regularly as it’s a great way of getting fresh content onto their websites. It’s also great to share news on social media via blog posts and so when I was looking for an easy guide for someone who is writing their first blog post in WordPress they were all full of fluff, and too much preamble. For example, they all started with ‘get a host’ or ‘register a domain’ but I just wanted to cut to the chase.
My assumption is that you already have a domain, a host and a login to WordPress which is installed. So here it is, so without any more of my own fluff, here’s how to write a blog post in WordPress!
Log into WordPress
To log into WordPress type the website address into your browser followed by ‘/wp-admin’. For example yourwebsite.com/wp-admin
You will then see the login screen below into which you need to enter your username and password. If you can’t remember your username then contact your developer, and if you can’t remember your password then click on the ‘lost your password’ link.

Create a new blog post
To add a new blog, choose ‘Add New’ under ‘Posts’ in the left hand menu.

You will then be presented with an empty screen into which you can type the content for the blog. You may see a help screen which explains a few tips about the block editor, which you can read if you like. It looks like the screen below so either click ‘Next’ to read the tips or close the window using the ‘X’ in the top right hand corner.

Blog title
The first thing to do is title your blog. I won’t go too much into SEO (search engine optimisation) here (I’ll save that for another day!) but your blog title will be the default for the URL you share and will help the blog show up in Google. Therefore you could include some keywords if you like, for example ‘How to make the best chocolate cookies’ if you want to rank for a chocolate cookie recipe. Or ‘Which is the best digital camera?’ is another example. It doesn’t have to be a question, but it should describe what you’re going to write about.

To add your blog title simply overtype the ‘Add title’ box with your own title.
Write some paragraphs
Next, you can add some paragraphs. You can do these directly in the ‘Start writing or type…’ block and at the end of each paragraph just tap the Enter key to start a new one. You can see the example below where I’ve added three paragraphs just by typing into the ‘Start writing or type…’ box.

Add subheadings
Once you’ve got all the main text, it’s good to break it up with a subheading. These are also good for user experience, to make them easier to read, and also for SEO (again, think about whether you want to try and add some keywords).
To add a subheading click on the little arrow above a paragraph to add a block and then choose ‘Heading’ from the list. It will give you an empty box in which to type your subheading. The default is an ‘H2’, which is a second level subheading and perfect for the subheadings you’ll need in your blog. You can just type the text in the box which is presented to you.

Add an image
Now the fun starts! It’s good practice and often helpful for visitors if you add images to your post. They can illustrate what you’re talking about or even just break up the text so that it’s less daunting to read.
Again, I won’t go into too much detail here but it’s important that images are less than 200kb in size. I recommend Fotosizer as an easy way of compressing images but there are a multitude of websites which will do the same thing.
When you have your image, give the filename a meaningful name rather than just ‘Image1’. Call it ‘chocolate-cookie’ or ‘sony-digital-camera’ which describes what it is (with hyphens between the words as Google can understand it better then).
To add the image click on the plus sign above the paragraph and choose Image from the list. Then choose ‘Upload’ and find the image you want to add from your computer.
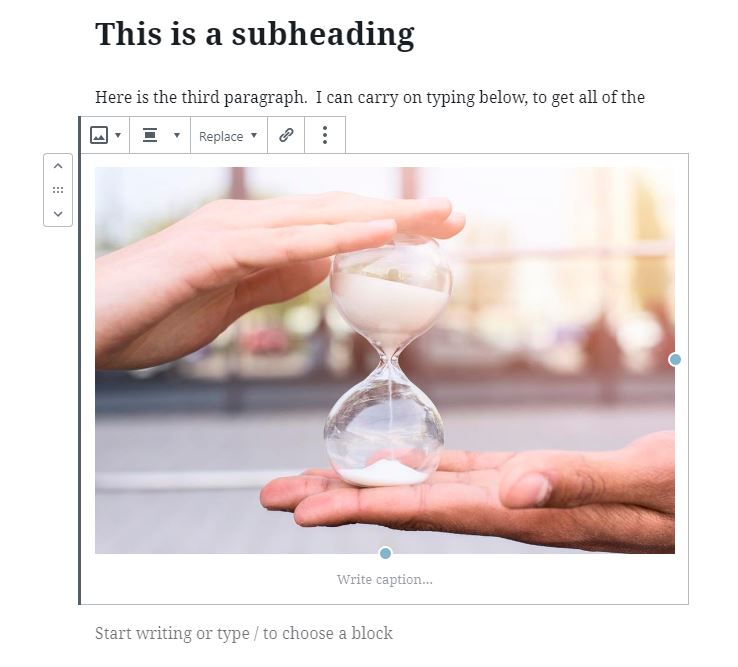
Here is what the image looks like when you’ve chosen it. You can add a caption by clicking on the ‘Write caption’ at the bottom.
On the right hand side of the screen you can also add alt text, which is for screen readers to explain what the image is, for people with poor vision. The alt text should just be a description of the image but is also a place that you can add keywords, as long as they are naturally included. For example ‘A red plate containing six chocolate chip cookies’ would be descriptive but also include your ‘chocolate chip cookie’ keyphrase.

Add internal and external links
It’s a really good idea to add links to blog posts. They could be links to other pages on your website (those are ‘internal’ links), or pages on other websites (external links).
To add a link you highlight some text which you want to be the ‘anchor text’ and then click on the hyperlink symbol which will appear above (shown below in yellow). When you click the hyperlink symbol you are presented with a box to put the hyperlink in, which is the URL to link to.

I would recommend clicking on ‘Open in new tab’ for external links only. If you’re being paid to add the link or it’s an affiliate link then also click on the second button, to make the link ‘nofollow’ (it’s a long story!). You will know yourself if it’s a sponsored link or advert, and if it is then you can also click on the ‘sponsored’ option. If you don’t know what either of these things mean then it’s unlikely you’ll need to choose it!
Moving paragraphs around
If you need to move blocks or paragraphs up or down then that’s really easy. Just click on the block you want to move and then use the up and down arrows which appear on the left, to move it (highlighted below in yellow).

Assign a category
For various reasons it’s a great idea to assign blog posts to a category. It’s easier for visitors to read blogs on a similar theme, and also it can be used to group them on a menu if you want to.
To set the category for your post, use the right hand options (make sure ‘Document’ is chosen at the top) and choose one of the options in the Categories section. You can tick one or more options, or add a new one. There is a default category of ‘Uncategorized’ if you forget, or would rather not use the category functionality.

If you have assigned more than one category then you should assign the primary category by choosing it from the dropdown list at the bottom. As you can see above, I’ve chosen the ‘Life’ and ‘Blogging’ categories as an example, but ‘Life’ is the primary category.
Assign tags
Tags are a further subdivision of how your blog can be found. For example, the chocolate cookie recipe could feature in the ‘Baking’ category but you might want to tag it with ‘chocolate’ and ‘kids treats’. To set the tag simply type what you want it to be in the box. If you start typing then existing tags will be displayed for you to choose from, or you could add new ones. You can have as many tags as you want for a post.

Tags and categories can be quite confusing, so this explanation from WP Beginner might help!
Set a featured image
Setting a featured image is useful for a few reasons. If you share the blog on social media then the featured image will be pulled up to show what the blog is about. Depending on your theme, the featured image will also be displayed when your blogs are listed on your News page. See below for the featured images for my News section on the homepage.

The featured image is usually a landscape image, although it does again depend how you’ve configured blog posts to display for your theme. Mobile results often show a square image too. Ideally you should pick an image that works for both landscape AND portrait crops, which isn’t always easy.
To add the featured image, go back to the panel on the right of the screen, with ‘Document’ selected, and look for the ‘Set featured image’ box. If you click on that then you can either choose an image from your media library or upload a new one.

Here is the featured image for this blog post, and you can change it using ‘Replace image’ or remove it using ‘Remove featured image’.
Save as you go
It’s a good idea to save your work as you go, just in case you get a power cut and lose everything. WordPress usually does regular saves behind the scenes but it’s always best to click the ‘Save Draft’ button every five minutes or so.

The Save Draft button is in the top right hand corner of the screen.
Add SEO metadata
Without going too deeply into SEO, it’s a really good idea to have an optimised title and snippet so that when people see your post in Google then they understand what it’s about.
The SEO title defaults to the name of the blog post, which is usually good but sometimes may not be enough. If you have the Yoast plugin then you can edit the title easily and lengthen (or shorten) it so that it goes green.
You can also use ‘Edit snippet’ to write the text which is shown in search engine results. Again, Yoast will show a green line when the text is at the optimal length.

If you want to learn about SEO then there are a multitude of blogs about it, but I would highly recommend my host’s dedicated training course all about the subject. It’s constantly-updated and incredibly detailed. There’s no fluff and it’s written by people who have been there and done it themselves. Here’s a link to the course to find out more.
Publish!
Once you’re happy with the blog, you can click the Publish button! You’ll find it near the Save Draft button in the top right hand corner and there’s also a Preview button if you want to see how the blog will look to people who read it.
If you write regularly then some of the apps in my previous blog post about my top business tools may be useful, including how to compress images and include emojis in your content.
This is really useful to learn how the new Gutenberg block editor works on WordPress.
Such a helpful blog – to the point and told me just what I needed to know. Bring on the next blog post I write with my new found skills!
Thanks for reading it Charlotte, and good luck with writing your own 😊
Thanks for pointing me at this guide – been really useful
Thanks for pointing me at this guide – been really useful